Carrying a 60 lb pack changes the math on every walk. Calories burned rises because your body moves additional mass and works harder to stabilize. This article explains how to estimate burn, plan pacing and recovery, and track results so you can train safely and consistently.
How to estimate calorie burn
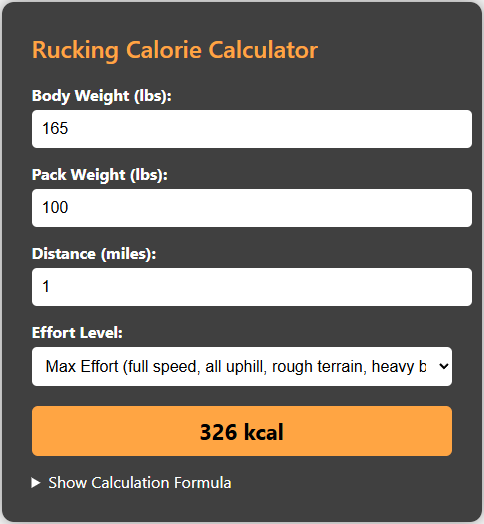
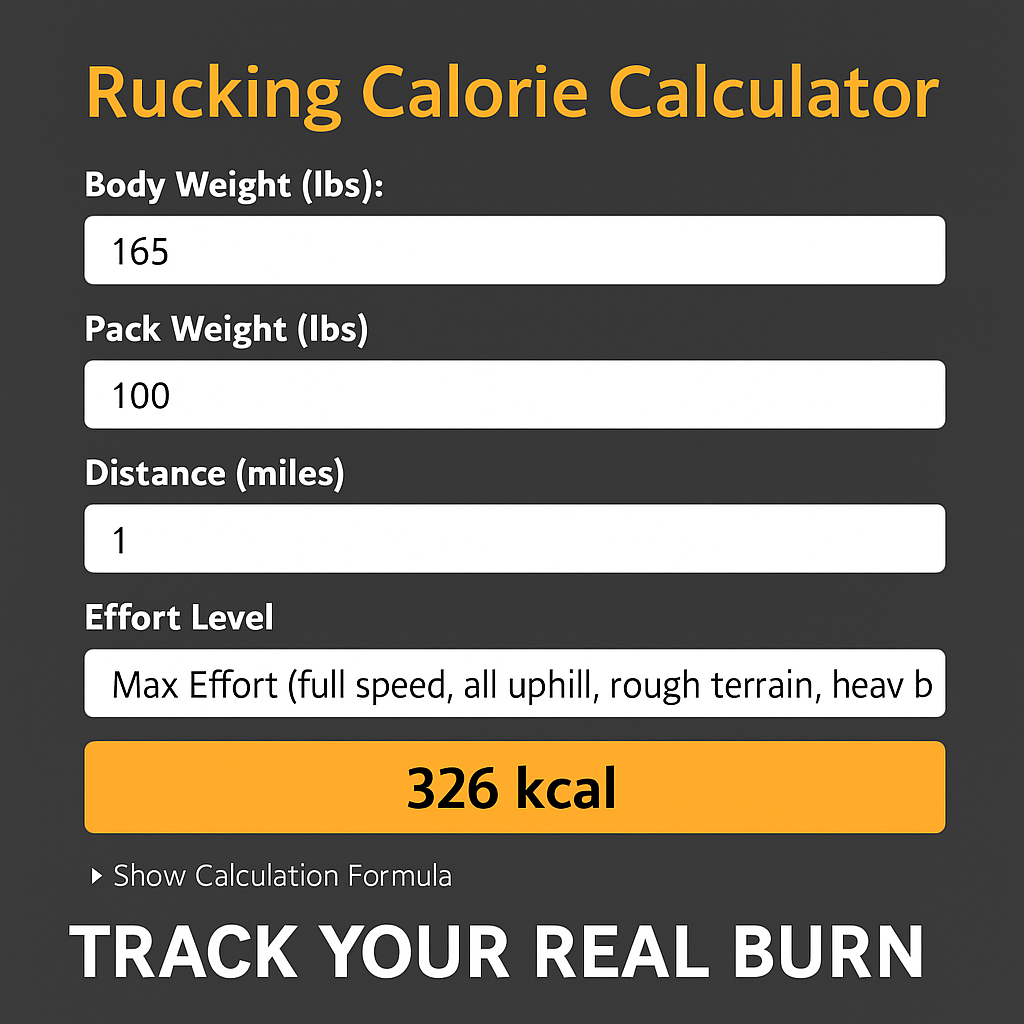
There’s no single number for everyone: bodyweight, terrain, pace, and pack fit all change the result. A reliable first step is to use a dedicated rucking calorie calculator that accounts for load and pace.
Pace matters: 3–3.5 mph is sustainable for loaded marching; faster speeds spike heart rate and calories but increase injury risk.
Pack fit and posture: keep load centered, use hip straps if your rucksack allows it, and avoid excessive sway.
Hydrate and program recovery days after heavy sessions on trails or uneven ground.
Gear to consider
For long rucks or mixed terrain the right pack makes a difference. The GORUCK Rucker 4.0 20L is a proven option for heavy, repetitive use.
GORUCK Rucker 4.0—durable for heavy loads and long rucks.
Tracking and tools
One calculator gives a baseline; consistent tracking reveals trends. Use the Rucking calorie calculator linked above to estimate per-ruck burn and adjust for your bodyweight and terrain. For day-to-day tracking, the Rucking app on Google Play is available now and designed specifically for ruckers:
The app records load options (backpack or weighted vest), pace, and distance and links to a weight-loss calculator so you can track progress over weeks rather than single rucks.
Sample plan
Begin with two loaded walks per week at 20–40 minutes. Add one longer ruck on softer terrain as tolerance improves. Reassess pack weight and pace monthly and use the calculator to update estimated calorie burn.
Follow conservative progression and prioritize sleep, hydration, and protein on heavy training weeks to keep adaptation steady and injuries low.
Posted inUncategorized|Comments Off on Rucking calories with 60 lb pack: how to estimate burn and plan rucks
Rucking in cold weather demands planning, layered clothing, and mindset. This guide outlines practical steps to stay safe, efficient, and warm while rucking through winter conditions. Read these tactics before your next cold weather outing.
Preparation and layering
Prioritize moisture management. Start with a close fitting base layer that moves sweat away from skin. Add an insulating mid layer such as fleece or wool, then top with a windproof shell. Avoid cotton. Wet cotton steals heat and raises hypothermia risk. Keep spare socks and gloves in a waterproof pocket for emergencies.
Feet hands and circulation
Your feet set the tone for the whole ruck. Wear insulated boots sized to allow thicker socks without constriction. Use wool or synthetic socks, consider thin liner socks to reduce friction, and change socks at any sign of dampness. Keep hands warm with a dexterous glove system: thin liners under a waterproof insulated shell. Move often to encourage circulation; stomp, swing arms, and adjust layers before numbness sets in.
Hydration and calories
Cold air reduces perceived thirst, but calorie burn increases with heavier loads and colder temperatures. Carry warm fluids in an insulated bottle and sip frequently. Bring calorie dense snacks like nuts, cheese, and compressed bars to maintain energy. If you want to estimate calories burned while rucking, use the Rucking calorie calculator linked below to plan intake and recovery.
Pace load and route selection
Start slower than usual and tack on shorter routes when testing new cold gear. Cold muscles need longer warm ups so include dynamic movements before you carry significant weight. Reduce pack or vest weight slightly if wind chill is severe. Choose routes with shelter options for breaks and quick layer changes.
Foot care and blisters
Treat hot spots immediately. Use lubricant, tape, or blister patches. Keep toenails trimmed and inspect feet during rests. Change into dry socks at first chance and air out boots if possible at home.
Cold specific safety
Know signs of hypothermia and frostbite. Early hypothermia shows shivering, confusion, and slurred speech. Frostbite brings numbness and waxy skin. If you suspect either, get out of wind, add dry layers, and seek medical help when necessary. Carry a small emergency kit with hand warmers, space blanket, and a lightweight stove or chemical heat source for serious outings.
Gear recommendations
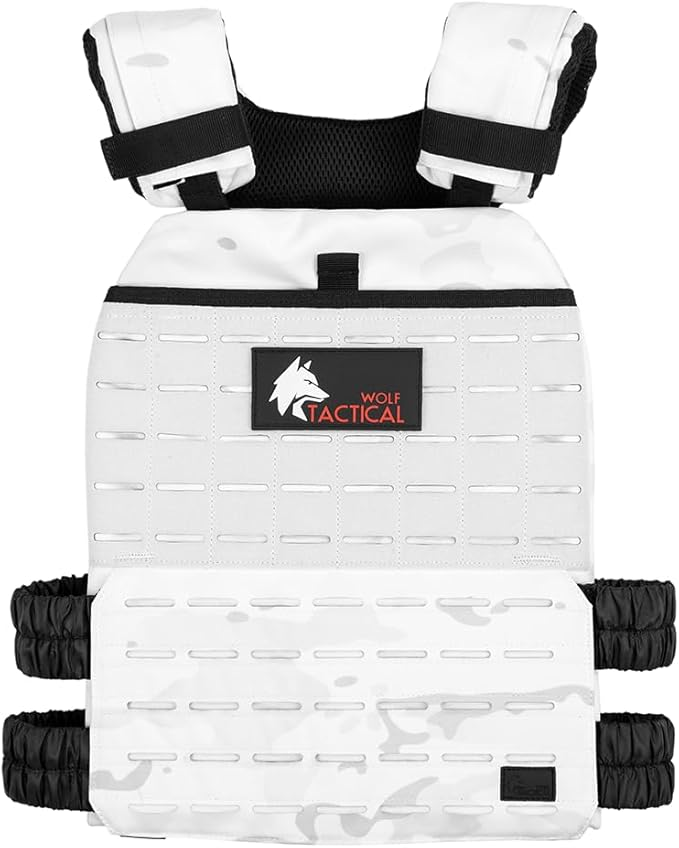
For cold rucks favor a comfortable vest and easy access pockets. The Wolf Tactical Adjustable Weighted Vest balances fit and insulation, and works well for shorter training sessions. See the linked vest below for fit notes.
Wolf Tactical vest offers adjustable fit, insulated coverage, and pockets for winter rucks.
Navigation and daylight
Shorter winter days require planning. Start early, avoid remote solo routes when possible, and carry a headlamp and extra batteries. Let someone know your plan and expected return time.
Using calculators and the Rucking app
Estimating calorie burn helps you fuel correctly. Use the Rucking calorie calculator for weighted vest or backpack rucking and adjust targets for cold environments.
Click the calculator screenshot below to open the tool and enter your load, pace, and temperature for a tailored estimate.
For accurate tracking on the trail, install the Rucking app on Android. It tracks calories burned while rucking or using a weighted vest, offers a weight loss calculator, and links to gear discounts. Tap the image below to open Google Play and install the app now.
Simple winter checklist
Base layer, insulating mid layer, windproof shell.
Insulated boots and spare dry socks.
Insulated water, high calorie snacks.
Hand warmers, space blanket, emergency heat source.
Headlamp, navigation, known bailout points.
Final advice
Start conservatively, adjust quickly, and prioritize warmth over pace. Training through cold builds resilience, but it should never override safety or prepared plans. Regularly use tools like the calorie calculator and the Rucking app to measure effort and recovery.
When packing, place fuel and frequently used items near your chest so you can access them without removing gloves. Rotate foot wear by alternating shoes between long outings to reduce cold related injuries.
Practice layering on short training rucks to learn what combinations keep you warm but prevent overheating. Start with a lighter vest load and increase weight over weeks, not days.
Know shelter options on every route, and carry a charged phone with location services enabled. If conditions deteriorate, be prepared to turn back early and try again another day.
Finally, respect winter weather. Proper planning, conservative pacing, and the right gear make cold rucking safe and sustainable. Use the linked tools and the app to plan outings and track progress.
Stay warm, stay consistent, and ruck smart.
Posted inUncategorized|Comments Off on Rucking in cold weather: Practical winter ruck tips
Rucking on trails changes the math on calorie burn. Uneven footing, elevation, and pack weight all increase effort compared to flat sidewalks. I write from incident-free field experience and coaching hundreds of outdoors-focused trainees: with a few simple checks you can estimate calories burned, then verify with a tool and adjust your pace or load for steady results.
Key factors that change calorie burn on trails
Pack or vest weight: every extra 10–20% of bodyweight raises energy cost significantly.
Grade and elevation change: uphill sections spike demand; steep downhills still cost energy for control.
Terrain: mud, loose rock, roots, and sand all lower economy and increase burn.
Pace and intensity: hiking pace versus brisk ruck pace matters more on trails.
Duration and rest: stop-and-go on technical trails reduces average speed but not total calorie expenditure.
Estimating calories before you go
Use your bodyweight, load, trail distance, and an estimate of average pace and elevation gain as inputs. For a practical, rapid estimate use the Rucking Calorie Calculator — it’s tuned for rucking and weighted-vest work and is the most direct calculator I recommend:
The calculator will ask for weight, load, speed, and distance. For trail use, increase the effective grade by adding an estimated 5–20% to account for technical footing and elevation, depending on how rough the route is.
How to track and validate your estimates
Start by using the calculator to generate a baseline. Then track a few real sessions using heart rate or perceived exertion and compare. If your trails are steep or technical, expect actual burn to be 10–25% higher than flat estimates. If you carry more frequent stops or slow scrambles, expect higher totals.
Gear tips for accurate, sustainable trail rucking
Comfort and proper load distribution help maintain pace and reduce wasted energy. For trails I usually recommend a hydration-compatible ruck that lets you carry water and distribute weight evenly. The CamelBak Motherlode 100oz Mil Spec Crux Hydration Backpack is a durable option for long, technical outings:
Hydration and load stability for longer trail rucks.
For more rugged, military-style trail loads I recommend a dedicated rucksack like the GORUCK Rucker 4.0 20L which carries plates and keeps weight centered on the hips:
Ruckpack built for heavy, long-distance trail loads.
Use the Rucking app to track calorie burn in the field
For Android users the Rucking App on Google Play lets you track calories burned while rucking or using a weighted vest, and includes a weight-loss calculator tuned to rucking inputs. Tap the image to open the app page and install. The app helps you log actual session calories and compare them to your calculator estimates:
Practical checklist before a trail ruck
Estimate calories with the Rucking Calorie Calculator and adjust for technical terrain.
Pack water, snack, and emergency layers; hydration affects performance and calorie burn.
Start conservatively with weight — add load across sessions to measure fatigue and burn.
Record pace, heart rate, and perceived exertion to refine future estimates.
Trail rucking is a reliable way to raise calorie expenditure and build durable fitness. Use the calculator to plan, the app to track, and sensible gear to keep your pace steady so your estimates match real-world burn.
Posted inUncategorized|Comments Off on Rucking calories on trails: estimate, track, and optimize your burn
Rucking calculator app — track calories and weight loss on the trail
Rucking with a weighted vest or loaded pack changes the math of calorie burn. The rucking calculator app described here gives you a tool to track that work on the go, compare sessions, and plan progress toward weight loss and strength goals. This article explains what the app does, how it differs from a generic fitness tracker, how to use the calculator built into rucking.pro, and practical advice for getting reliable numbers from your outdoor rucks.
The app on Google Play is designed for ruckers who need accurate calorie estimates when wearing a weighted vest or carrying a rucksack. It asks for body weight, load weight, walking speed, distance, and terrain, and then applies a rigorously built formula that reflects added metabolic cost from external load. The app also links directly to a rucking-specific calorie calculator on rucking.pro so you can check numbers on desktop or share screenshots from a phone.
Start a session by tapping the rucking app, enter your live weight and the weight of your vest or pack, then select walking pace. The app records distance and duration and provides a session calorie estimate you can use for daily energy budgeting. Unlike step-only trackers, the rucking calculator app factors external mass and movement speed, which is essential if you are using a weighted vest to burn fat or preserve muscle during a diet.
Why the app and calculator matter
Carrying load alters energy cost linearly and sometimes nonlinearly depending on terrain and incline. Ruck training places a steady oxidative demand on the body while allowing you to carry meaningful load for progressive overload. When you track these sessions consistently you can estimate weekly and monthly energy expenditure and adjust nutrition. That’s what the app and the rucking.pro calculator aim to make simple.
How to use the rucking.pro calculator with the app
Open the app and enter weight, load, and distance for a quick session readout.
Tap the calculator link in the app to view the same session on rucking.pro for deeper analysis.
Use the screenshot link below when you want a larger view or to save a session number for planning.
The app and the online tool are particularly useful when you run a weight-loss program that includes rucking. Use a conservative calorie estimate from the calculator when planning a deficit so you do not underfuel for recovery. The mobile app also stores sessions so you can average daily burn across weeks and detect trends when you increase load, pace, or frequency.
Practical tips for more reliable numbers
Weigh your vest or load with a scale and enter the real number rather than a guessed round number.
Record pace by distance and time instead of relying only on perceived effort.
Adjust for terrain: soft sand, steep hills, and uneven trails increase energy cost beyond flat pavement numbers.
Use the app consistently so your baseline and progression are comparable.
If you prefer a traditional weighted vest for comfort during longer walks consider the Wolf Tactical Adjustable Weighted Vest. It is beginner friendly, distributes load well, and works for both walking and strength work. Compare sizes before buying and read reviews.
Wolf Tactical Adjustable Weighted Vest for comfortable rucking and progressive loading.
Also remember hydration matters on long loaded walks. If you use a rucksack or hydration pack, the CamelBak Motherlode 100oz Mil Spec Crux Hydration Backpack works well to combine fluid and weight carriage. The app can help you estimate caloric burn with different pack weights so you can plan hydration and nutrition accordingly.
CamelBak Motherlode packs hydration and load carriage for long rucks.
Install the app on Android devices from Google Play to get the tracker, calculators, and links to gear and discounts. The app lets you track how many calories you burn while rucking or using a weighted vest, offers a weight loss calculator tailored for rucking, and ties to gear recommendations. Tap the image below to open Google Play.
Final guidance
Use the rucking calculator app as a decision tool, not an absolute truth. Treat estimates as a useful baseline for nutrition and recovery planning. Combine consistent tracking, practical load progression, and honest reporting of effort and you will get trustworthy trends that improve training and weight management outdoors.
Quick checklist: log vest weight, record distance and terrain notes, compare similar sessions weekly, and use both the mobile app and the online calculator for cross check. The calculator screenshot above is a quick visual reference when you need a desktop breakdown. For heavy ruck sessions or long distances consider swapping to a ruck plate carrier or hydration rucksack, and always check that your shoulder straps and hip belt are properly adjusted before long efforts. Compare sizes before buying and read reviews.
Posted inUncategorized|Comments Off on Rucking calculator app: track calories with weighted vests
Plan a sensible calorie deficit around ruck sessions so you lose fat and keep strength. A rucking calorie deficit calculator estimates burn from bodyweight, pack or vest weight, pace and duration. Use that number to set a weekly deficit that preserves performance.
How to use it
Enter bodyweight and ruck or vest weight
Record pace and duration of typical sessions
Set a weekly calorie target and track progress
Start with the dedicated calculator below to see realistic burn for weighted rucks and vests.
Track ruck workouts and your deficit on Android with the Rucking app:
Adjustable vest for daily rucking and steady calorie burn.
Posted inUncategorized|Comments Off on Rucking calorie deficit calculator guide
Rucking puts repeated friction and moisture on the feet. Preventing blisters is mostly about fit, moisture control, and early intervention. These are field-tested, practical steps to keep your miles productive and pain-free.
Fit and footwear
Start with boots or trail shoes that match your foot shape. A shoe that pinches or allows sliding creates hotspots. Break in footwear gradually with short weighted walks before long rucks.
Choose the right size with a thumb’s width of toe room.
Opt for boots with firm heel counters to limit slip.
Use lacing techniques (heel lock) to secure the foot without overtightening.
Socks and moisture management
Moisture-wicking socks are essential. Merino or synthetic blends move sweat away from skin; cotton holds moisture and increases friction. Consider thin liner socks under a thicker hiking sock to reduce shear.
On-ruck tactics
Pay attention to hotspots—areas that feel warm or irritated. Address them immediately: stop, dry the area, apply friction-reducing balm or tape, and adjust footwear. Carry a small foot kit: moleskin, blister tape, antiseptic wipes, and a needle if you know how to drain safely.
Repair and prevention
If a blister forms, protect it. Intact blisters can be covered with cushioned tape; large, painful blisters sometimes need sterile drainage and appropriate dressing. After a blister, reassess sock choice and fit before your next ruck.
Tools and tracking
Estimate effort and know when to back off. Use the rucking calorie calculator below to gauge how weight and pace affect effort so you can plan rest and sock changes on longer miles.
Track ruck sessions and calorie burn with the Rucking app on Google Play. The app lets you log rucks, select weighted-vest options, and use a weight-loss calculator tailored for rucking and vest work. Tap the image to install.
Final checklist
Proper fit and broken-in footwear.
Moisture-wicking socks; consider liners.
Immediate attention to hotspots.
Small blister kit and basic treatment knowledge.
Plan rest and sock changes on long weighted rucks.
Keep the approach simple: prevent where possible, treat early, and respect your feet on every weighted mile.
Posted inUncategorized|Comments Off on How to avoid blisters rucking
When you ruck with a weighted vest or pack your heart rate is the single best physiological indicator of effort available on a practical rucking day. Measuring beats per minute lets you adjust pace, cadence, terrain choices, and rest to match a target calorie burn without guessing.
Why heart rate matters for calorie math
Resting metabolic rate, carrying load, and exercise intensity all contribute to calories burned. Heart rate integrates those factors because it rises with demand. Two identical rucks at different heart rates can produce markedly different calorie totals even when distance and weight are the same. That matters for weight loss, recovery scheduling, and programming tempo days versus hard days.
A simple heart rate approach
Find a sustainable training heart rate zone for your goals: fat loss, endurance, or aerobic capacity.
Use perceived exertion with your beats per minute to set realistic targets.
Track intervals where heart rate spikes and note terrain or pacing that caused the change.
How to measure accurately in the field
Wear a chest strap or a reliable wrist monitor and validate it against hard efforts. Wrist trackers can lag on steep hills or under heavy loading; chest straps usually handle that variability better. For a beginner rucker, choose a conservative zone and increase duration before adding weight.
Using the Rucking Calorie Calculator
For practical numbers use the Rucking Calorie Calculator. It factors weight, pack or vest loading, pace, and duration. Click the image below to open it and enter your heart rate-informed pace to get a realistic calorie estimate.
How to combine heart rate with calorie targets
Set a weekly calorie or deficit target and plan rucks as sessions that fit into microcycles. Use steady-state lower heart rate rucks for long duration calorie accumulation and interval-style higher heart rate rucks for excess post exercise oxygen consumption and metabolic stimulus. Alternate intensity days and track the sum of calories rather than single-session highs.
Practical training plan example
Two steady rucks per week at a moderate heart rate for 60 to 90 minutes.
One tempo or hill ruck at a higher heart rate for 25 to 40 minutes.
One recovery walk with light vest or unloaded for active recovery.
Tips to improve accuracy
Log weight, distance, pace, and heart rate every ruck. Note environmental factors like heat and humidity; they raise heart rate for the same workload. Calibrate your monitor occasionally with a lab test or known-effort intervals.
Rucking app and on-the-go tracking
Use the Rucking app on Android to track calories and heart rate while rucking. The app supports both rucksack and weighted vest options, stores sessions, and links to a weight loss calculator to help program workouts. Tap the image below to install the app from Google Play.
Gear considerations
A reliable weighted vest that distributes load evenly reduces erratic heart rate spikes from poor fit. If you favor comfort and day to day consistency consider the Wolf Tactical Adjustable Weighted Vest.
Wolf Tactical vest is a beginner friendly, adjustable option that maintains comfort and consistent load placement.
Common heart rate mistakes and fixes
Ruckers often make predictable errors when they rely on heart rate data. The first is chasing an arbitrary number without considering recovery, stress, or sleep. A high heart rate after a poor night of rest does not mean you should push harder; it usually means you should back off. Second, people forget that heat and humidity raise heart rate for the same external workload; that can overestimate calorie burn if unadjusted. Third, inconsistent monitor placement or strap looseness can create spikes and dropouts that inflate averages. Fourth, mixing different sensors without cross checking creates an unreliable log. Fixes are straightforward. Prioritize consistent monitor use and validate devices monthly with a timed interval test. Adjust target zones after a recovery week and account for weather by reducing estimated calories on hot days by a conservative percentage. Finally, pair heart rate data with subjective measures like RPE and sleep quality to make daily decisions that support long term progress.
Final checklist for heart rate based calorie tracking
Use a validated heart rate monitor.
Record weight, distance, pace, and beats per minute.
Enter numbers into the calculator for session estimates.
Adjust training zones based on weekly recovery and progress.
Measure, log, adapt, and the numbers will follow. Rucking is simple physics applied to human bodies; control the variables you can and let heart rate guide the rest.
Posted inUncategorized|Comments Off on Rucking heart rate calories: measure effort and plan burn
Rucking hills is one of the fastest, most reliable ways to build leg strength, conditioning, and calorie burn while carrying real load. A focused rucking hills training plan mixes hill repeats, steady loaded walks, recovery days, and progressive overload in the vest or pack. I write this in the voice I coach from: practical, direct, and outdoor-first. If you want results, you need structure, measured progression, and consistency.
Principles to follow
Start light and add load slowly: your body adapts to weight before speed over rough ground.
Mix intervals and tempo: short uphill repeats build power; longer steady rucks build endurance.
Track and adjust: use a calorie and weight-loss calculator to measure progress and adjust calorie targets.
Sample 8-week rucking hills training plan
This 8-week plan assumes you ruck 3–4 days per week and have a basic level of fitness. Use a weighted vest or ruck pack depending on your goals. Start with a vest weight you can handle for 30 minutes of mixed uphill and flat walking without pain.
Week 1–2 (Base building): 3 rucks — two 30–45 minute steady rucks on rolling hills at conversational pace, one short hill interval session: 5 x 60s uphill brisk walk with easy descent.
Week 3–4 (Volume & intensity): 3 rucks — one long steady 60–90 minute ruck on varied terrain, one hill repeat session: 6–8 x 90s uphill with 2–3 minute recoveries, one recovery easy 30-minute walk.
Week 5–6 (Progression): Add 5–10% load or extend intervals slightly. Long ruck becomes 90–120 minutes. Include one tempo hill ruck: sustained moderate uphill sections for 20–30 minutes total volume.
Week 7–8 (Sharpening): Peak volume in week 7, then deload week 8: reduce load and distance by 30–40% to recover and test fitness.
Session examples and technique
Hill repeats: stay tall, use short powerful steps, push from the hips, breathe steadily. Walk hard — it’s not a sprint.
Tempo uphill: maintain a pace you can sustain for 10–20 minutes; focus on steady effort rather than speed.
Loaded long ruck: practice nutrition and hydration systems you’ll use on longer outings.
Tools: calculators, app, and gear
Use the Rucking calorie calculator to estimate calories burned for weighted vest or backpack rucking. It helps dial load, speed, and duration so you progress safely.
For tracking on the go, the Rucking app is available on Google Play and links directly to the calorie and weight-loss tools, gear discounts, and ruck tracking. Install it for accurate session tracking and progressive plans.
Recommended gear
For hill-focused rucking favor a stable vest or a durable ruck with good load distribution.
WOLF TACTICAL Simple Weighted Vest—comfortable, low-profile, good for repeated hill work.
For longer distance hill rucks where you need hydration and pack capacity, consider a ruck like the GORUCK Rucker.
GORUCK Rucker 4.0 20L—built for long, loaded rucks over varied terrain.
Coaching note
As an ISSA-certified trainer who used rucking and weighted-vest work to change body composition, I recommend slow, consistent progression. Increase weight only when technique and recovery are dialed. Track your workouts and calories with the calculator and app so you know what works for your body.
Quick checklist before a hill session
Check shoes and footing; hill rucking is hard on ankles.
Start with a warm-up and end with mobility work for hips and calves.
Hydrate and refuel after long or intense hill work.
Follow this rucking hills training plan for measured progress, and use the tools linked above to keep training efficient, safe, and results-driven.
Posted inUncategorized|Comments Off on Rucking Hills Training Plan for Progressive Strength and Endurance
Apple Watch rucking calories inaccurate? Learn why the watch misestimates loaded walks, how to validate numbers with a rucking calculator, and practical fixes. Continue reading →
Rucking cadence tips to stabilize pace, protect joints, and improve calorie burn while rucking with a weighted vest. Practical cues, drills, and tracking advice. Continue reading →
Looking for the best app to track rucking? Practical guide to tracking distance, pace, carried weight and calories, plus Android app and the Rucking calorie calculator. Continue reading →
Estimate rucking calories with 30 lb pack using a practical method and the Rucking calorie calculator. Learn adjustments for terrain, pace, and real-world tracking. Continue reading →
Estimate rucking calories per mile accurately — learn how weight, pace, terrain, and vests change burn. Use the Rucking calorie calculator and the Android app to track results. Continue reading →
Use the ruck calorie calculator to estimate calories burned while rucking or using a weighted vest. Practical guidance to plan sessions and nutrition. Continue reading →
Rucking calorie calculator hills guide: learn how incline, pack or vest weight, pace, and terrain change calorie burn. Use the Rucking Calorie Calculator app. Continue reading →
Estimate rucking calories with 20 lb pack — examples for common weights, pace and terrain. Use the Rucking calorie calculator and Android app to log burns. Continue reading →
Expert tips to choose the best boots for rucking — fit, support, traction, break-in, insoles, and pairing with rucks for loaded walks. Practical outdoor advice. Continue reading →
Use the rucking app offline to log distance, load, and calories reliably when off-grid. Practical tips for preloading routes, syncing later, and choosing gear. Continue reading →