Rucking calories app android: Track calories accurately while rucking

Introduction

If you ruck and want a reliable Android solution to track calories, distance, and load, the Rucking.Pro app for Android is built for that purpose. This guide explains how the rucking calories app android works, why it’s more accurate than generic activity trackers when you carry weight, and how to use the built-in calculators and features to support weight loss and conditioning.

Why a rucking-specific Android app matters

Generic fitness apps estimate calorie burn based on steps and heart rate. When you add a weighted vest or a loaded backpack, energy cost increases nonlinearly. The rucking calories app android lets you select weighted-vest or backpack modes, enter load, pace, and terrain, and get a more practical calorie estimate for ruck training. It also stores sessions for trend analysis and helps you plan progressive loading.

How the app measures calories

The app combines user weight, carried load, pace, and time to estimate energy expenditure using validated formulas adapted for load carriage. For most users this produces a better match to observed results than step-only trackers. The app also pairs well with a heart-rate strap for improved accuracy on variable-intensity outings.

Quick start: set up and routine

  • Install the app from Google Play and allow location and background access.
  • Enter your bodyweight, typical vest or pack weight, and preferred units.
  • Choose ruck mode: weighted vest or backpack, then start a timed walk or hike.
  • Review the session summary to see calories burned, distance, average pace, and load info.

Using the calculator to plan sessions

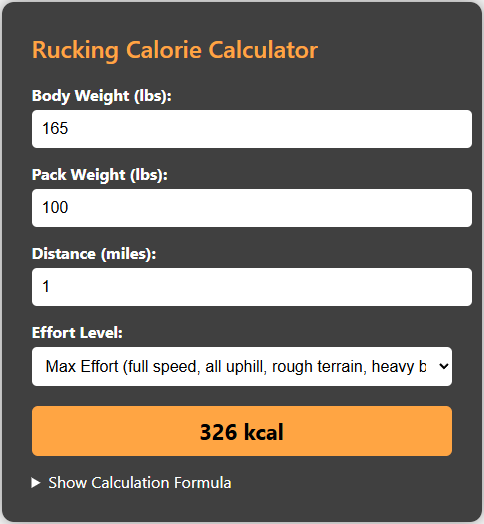
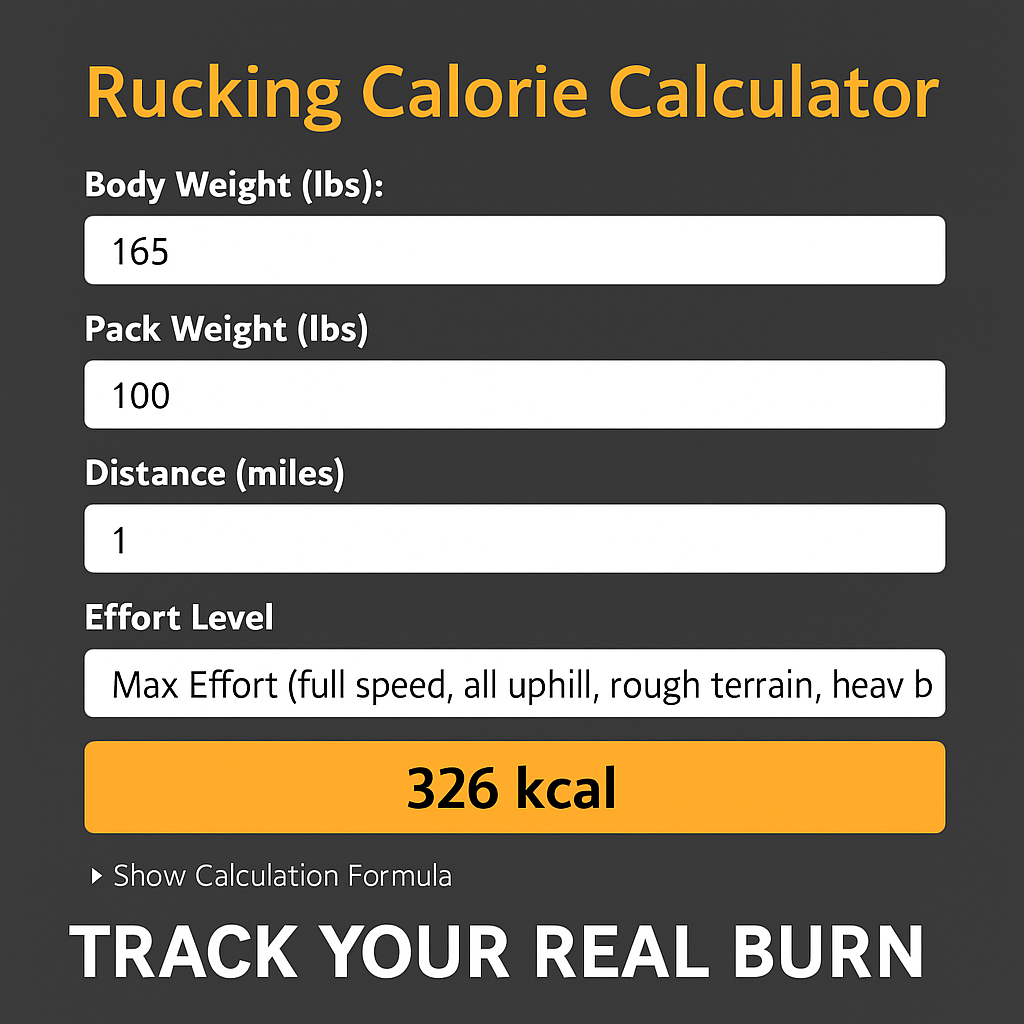
You can plan training sessions using the Rucking Pro calorie calculator to estimate burns for different loads and distances. Use this tool to set realistic calorie goals and avoid overtraining. Try the calculator here:

Rucking calorie calculator screenshot

Practical programming tips

Progress load slowly

Increase vest or pack weight by small increments, no more than 10% of your current load each week. Focus first on consistent walking mechanics and posture to avoid injury.

Prioritize recovery and consistency

Rucking is cumulative. Two moderate sessions per week beat one maximal session for long-term fat loss and work capacity. Track sleep, hydration, and soreness in the app notes for better planning.

Gear recommendations

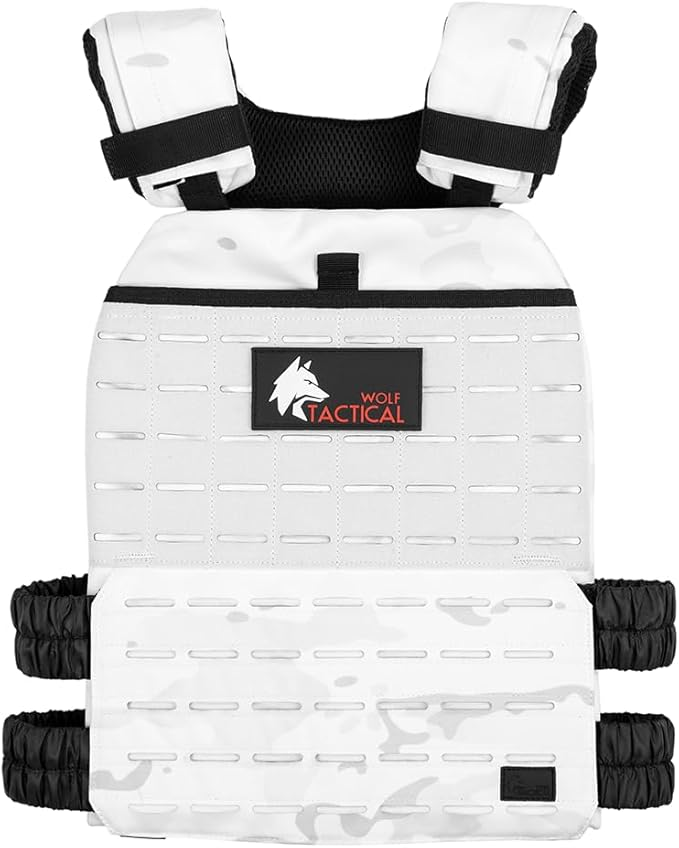
For long rucks or mixed cardio and load carriage, a reliable ruck like the GORUCK Rucker 4.0 20L is a durable option. For everyday weighted-vest training, the Wolf Tactical Adjustable Weighted Vest is comfortable and adjustable.


Wolf Tactical Adjustable Weighted Vest for rucking and weighted-vest walking
Wolf Tactical Adjustable Weighted Vest offers modular loading and a secure fit for ruck-style walks.

Integrating calorie goals and weight loss

Use the app’s export and trend features to build weekly calorie budgets. Pair rucking with a modest calorie deficit and protein-focused nutrition to preserve lean mass. If you prefer a planning tool, use the calculator above to compare scenarios before changing your diet.

Download and link to the Android app

The rucking app is available on Google Play for Android users. Tap the image below to open the store page. The app tracks calories for rucking and weighted-vest sessions, includes a weight-loss calculator, and links to gear and discounts.

Rucking Pro app on Google Play

Advanced tips for accurate tracking

When you want to squeeze more accuracy from the rucking calories app android, pair it with a chest strap heart-rate monitor and calibrate pace with a measured route. Use the app notes to mark terrain—sand, steep climbs, and technical trails increase metabolic cost substantially. For interval-style ruck sessions combine short hill repeats with light loads and record perceived exertion to tune future volume. Exporting session CSVs lets you analyze weekly load versus calorie total and avoid spikes that invite injury.

Safety, footwear, and hydration

Good footwear and load distribution matter. Choose a supportive trail shoe or lightweight boot and check that your vest or pack sits high on the torso to protect hips and lower back. Hydration is non-negotiable; for long or hot-weather rucks consider electrolyte support like Pump-Ocalypse, which many endurance ruckers use to maintain performance and reduce cramping. Carry at least one liter per hour for pacing in heat and more when you add weight. Small tweaks—shorter stride, faster cadence, core bracing—reduce lower-back stress and preserve running-friendly mechanics. Track these variables in the app and adjust weekly totals rather than chasing a high-calorie session. Stick with steady progress, and the rucking calories app android will help you move safely toward your goals.

Final notes from a trainer

As an ISSA-certified trainer who has coached through ruck and vest training, I recommend focusing on steady progression, consistent tracking, and patience. Whether you are after fat loss, conditioning, or a practical way to get outside with a load, the rucking calories app android gives the context you need to measure work and make sensible training decisions.

Posted in Uncategorized | Comments Off on Rucking calories app android: Track calories accurately while rucking

Rucking for beginners over 300 lbs: a practical starting guide

Rucking for beginners over 300 lbs

Rucking for beginners over 300 lbs is practical, safe, and effective when approached with conservative progression and attention to comfort.

This guide gives step by step priorities for a large-bodied rucker: equipment choices, walk tempo, load scaling, nutrition basics, and recovery tactics to keep you moving without injury.

Start slow and smart

Start slow and smart

If you weigh over 300 pounds you do not need heavy weight to get benefit. Begin with bodyweight walks, short intervals, and a supportive vest or ruck that fits without chafing.

Assess mobility and footwear

Assess mobility and footwear

Check ankles, knees, hips and standing balance before adding load. Choose supportive footwear with a stiff sole and wide base. If balance is a concern start with a hiking pole or two.

Equipment priorities

Equipment priorities

For beginners favor comfort and simplicity: a well fitting vest or a low profile ruck with padded straps. Consider the Wolf Tactical Simple Weighted Vest for padding and ease of use when you add small plates.

A hydration pack like the CamelBak Motherlode is useful on longer walks and for people who sweat a lot; hydration prevents fatigue and makes consistent progress more likely.

Load progression and pacing

Load progression and pacing

Start with bodyweight only for two to four weeks, building a consistent 20 to 40 minute brisk walk three times per week. Then add 5 to 10 pounds of distributed weight in a vest or small ruck plate and keep intensity low until movement feels secure.

Use perceived exertion rather than pace; talk-test intensity keeps cardiovascular stress manageable while your joints adapt.

Programming and frequency

Programming and frequency

Aim for three to four ruck sessions per week, alternating easy days with one slightly longer but still moderate session. Include two days of mobility and light strength work targeting hips, glutes, and posterior chain.

Nutrition and recovery

Nutrition and recovery

For weight over 300 pounds caloric control plus progressive activity is key. Start with modest reductions using whole foods, protein at meals, and avoid extreme restriction. Sleep, foot care, and anti inflammatory strategies like icing after long walks help recovery.

Calculator and tracking

Calculator and tracking

Use a reliable calorie calculator to estimate burn and bridge workouts with nutrition. Try the Rucking calorie calculator linked below; it accounts for weight, pace, and load so you can adjust targets safely.

Rucking calorie calculator screenshot

Track walks with the Rucking app on Google Play — the app records calories burned while rucking or using a weighted vest, includes a weight loss calculator and gear links.

Rucking app on Google Play

Preston Shamblen lost 90 lbs through rucking, weighted-vest training, and disciplined nutrition and still recommends vests as a reliable way to burn fat and maintain weight loss.

Practical tips

Practical tips

  • Begin with ten to twenty minute walks and add five minutes each week.
  • Use short rest breaks and stop for pain, not discomfort.
  • Keep vest load under 10% of bodyweight for early weeks.
  • Prioritize even weight distribution and avoid sudden increases.

If pain persists consult a physical therapist and consider swapping to a backpack ruck or reducing sessions. Rucking is cumulative work; consistency matters more than intensity at the start.

Gear recommendations

Gear recommendations

For comfort choose the Wolf Tactical Simple Weighted Vest; for hydration during longer rucks consider the CamelBak Motherlode.


Wolf Tactical Simple Weighted Vest for comfortable beginner rucking
Comfortable beginner vest with small weight capacity.

CamelBak Motherlode hydration pack ideal for long rucks
Hydration and storage for long walks and rucks.

Final thoughts

Final thoughts

Rucking for beginners over 300 lbs is about building durable habits: short walks, supportive gear, conservative loads, and consistent recovery. Use the calculator, track with the app, and move steadily.

Common mistakes

Common mistakes

A few common mistakes: starting with too much weight, ignoring foot pain, and skipping easy days. Also people often underestimate hydration and footwear; blisters and joint soreness are preventable with slower progression and proper socks.

Sample 8-week plan

Sample 8-week plan

Three walks per week, fifteen to twenty minutes, no added weight, focus on steady pace and foot care.

Add five pounds distributed in a vest, keep sessions similar length, add one mobility day and light band work.

Increase walk time to thirty to forty minutes on one session, maintain other sessions at twenty to thirty. Increase weight by another five pounds only if form is unchanged.

One longer moderate ruck at forty to sixty minutes with controlled load, two easier active recovery walks, and reassess comfort and goals.

Safety checklist

Safety checklist

Warm up five minutes, check shoes, start on soft surfaces, carry ID and phone, monitor heart rate if possible, stop for sharp pain, progress slowly with rest days.

Consistency over months produces durable changes; celebrate small wins like longer uninterrupted walks, fewer breaks, and improved balance. If you need structured help contact a certified trainer or physical therapist who understands load carriage for larger athletes.

Use the app and calculator, and be patient with progress.

Posted in Uncategorized | Comments Off on Rucking for beginners over 300 lbs: a practical starting guide

Rucking every day weight loss: Practical plan

Rucking Every Day for Weight Loss: Practical Plan

Rucking every day can be an efficient, low-cost way to create a sustainable calorie deficit and preserve muscle while you lose weight. This guide lays out a realistic, progressive plan that focuses on frequency, load, recovery, and simple nutrition so you can make daily rucking work without burnout.

Progression and Recovery

Start conservative: three to four ruck sessions the first week, then build to daily sessions over four to six weeks. Begin with a light load — 10 to 15 percent of bodyweight is sensible for most beginners — and prioritize steady walking pace, not speed. Daily rucking is more sustainable when intensity is managed.

Plan easy days: active recovery, mobility, or short unweighted walks reduce risk of overuse injuries. Listen to your body — soreness is normal, pain that alters movement patterns is not. Rotate routes and surfaces to vary impact and use footwear with good support.

Track calories burned to ensure your daily rucks produce a net deficit. Use the Rucking Calorie Calculator to estimate energy cost for a weighted vest or backpack ruck — it’s the simplest way to plan progression and portion sizes.


Rucking Calorie Calculator screenshot
Estimate calories burned with the Rucking Calorie Calculator.

Rucking app on Google Play
Track calories and weight loss on your phone.

A practical daily template: 30–60 minutes at conversational pace with 10–20 percent bodyweight most days, and one longer 75–120 minute ruck once per week. If you carry higher loads reduce frequency or insert an extra rest day. Progress load before pace: add five pounds every one to two weeks if recovery stays good.

Nutrition matters: aim for a modest 300–500 calorie daily deficit from maintenance, prioritize protein (0.6–0.8 g per pound bodyweight), and keep meals simple. Daily rucking preserves lean mass better than cardio-only approaches when protein intake and resistance work are maintained.

Choose gear that supports daily use: a comfortable adjustable vest or a hydration rucksack will reduce friction and make consistency possible. For an approachable vest consider the Wolf Tactical Weighted Vest. For longer routes pick a supportive hydration pack like the CamelBak Motherlode.


Wolf Tactical Weighted Vest for rucking
Comfortable adjustable vest for everyday rucking.

CamelBak Motherlode hydration backpack
Hydration pack with capacity and room for small loads.

Form, Pace, and Progression Tips

Form matters: stand tall, take slightly shorter steps when loaded, engage core, and keep shoulders relaxed. Heel-toe roll is fine; avoid overstriding which increases braking forces. Maintain a conversational pace for fat loss sessions and save interval efforts for shorter days.

Use perceived exertion or heart rate zones if you have a monitor. Most daily rucks should sit in Zone 2 (conversational, aerobic) to maximize fat oxidation and recovery. Short high intensity rucks twice monthly can preserve conditioning but are not required for weight loss.

Log weight, circumference, and ruck metrics weekly. The app stores sessions and calories, creating a clear trendline that beats guesswork. If plateaus linger, reduce calories slightly or add one extra longer ruck each week rather than daily increases that raise injury risk.

Sample week (after adaptation):

  • Mon: 45 min easy ruck with 10% bodyweight.
  • Tue: 30 min mobility + bodyweight strength.
  • Wed: 60 min ruck with 12–15% bodyweight.
  • Thu: 30–45 min easy ruck.
  • Fri: Rest or short unweighted walk.
  • Sat: 90 min long ruck with hydration pack.
  • Sun: Active recovery, mobility, or optional short ruck.

Injury prevention: strengthen hips and ankles with twice weekly resistance work, maintain calf and plantar mobility, and swap surfaces. Incremental increases in load and duration avoid tendinopathy. If joint pain arises, back off load and prioritize mobility and soft tissue work.

Consistency wins. With steady daily rucks, sensible nutrition, and measured progression you should expect 0.5–2 pounds per week depending on starting point. Use the app to keep honest records, swap gear if discomfort persists, and treat rucking as a long-term lifestyle habit rather than a short sprint.

Affordable, reliable gear keeps you consistent. A Wolf Tactical vest provides padding and adjustability for everyday wear and is a good starting point for most ruckers. For hydration and longer routes the CamelBak Motherlode offers capacity and durability. Always break in new footwear and carry a simple first aid and blister kit on long rucks. Follow consistent pacing, track with the app, and treat daily rucking as a scalable habit you can sustain for months and years to come. Start sensibly today, consistently.

Posted in Uncategorized | Comments Off on Rucking every day weight loss: Practical plan

Rucking on treadmill vs outside: Which is better?

Rucking on a treadmill vs outside

Rucking on a treadmill vs outside is a common question for people who want to add weighted walking to their routine. Both options work. The choice should match your goals, safety, weather, and available gear. This guide compares the two environments with practical tips, gear notes, and a simple plan to make rucking productive whether you train indoors or outdoors.

Why people choose a treadmill

A treadmill gives control. You can set pace and incline precisely, avoid unsafe routes, and ruck when weather would otherwise cancel a session. Treadmills are ideal for focused calorie work, steady-state conditioning, or progressive overload with timed intervals. For rehab or return-to-walk programming, the treadmill’s predictable surface reduces trip risks and lets you emphasize cadence and load without worrying about terrain.

Why people choose outside

Outside rucking offers variety and functional stressors that a treadmill does not. Uneven ground, wind, and the need to steer, balance, and ascend real hills change muscle recruitment and coordination. Outdoor rucking builds situational fitness and mental resilience. It also tends to be more enjoyable for people who value sunlight, fresh air, and route creativity.

Physiological differences

Aerobic demand is similar at matched speed and grade, but outside rucking increases stabilizer work and energy lost to micro-adjustments. Carrying the same weight outdoors often feels harder. Heat and wind can raise perceived exertion, while shade and cooling breezes lower it. If calorie burn is your metric, both work—small factors like terrain and stop-start walking will change totals.

Practical pros and cons

  • Treadmill — Controlled incline, easier tempo intervals, predictable footing.
  • Outside — Real-world load handling, better balance and joint variety, exposure to weather.

Safety and injury considerations

Choose the surface that reduces your specific risks. If you are new to weighted vests, start on a treadmill or flat trail until your posture and gait adjust. As load increases, practice transitions and slippery surfaces outside at low weights. Always prioritize footwear, body position, and slow progression of load and time to avoid overuse injuries.

Gear recommendations

Weighted vests and ruck plates change how you move. For long-distance or military-style rucks consider the GORUCK Rucker 4.0 20L for durable carry and load distribution.


GORUCK Rucker 4.0 20L ruckpack
GORUCK Rucker 4.0 balances durability and load for long outdoor rucks.

If you want hydration and modular storage for mixed terrain, the CamelBak Motherlode 100oz Mil Spec Crux Hydration Backpack is an excellent choice for combining water and weight.


CamelBak Motherlode tactical hydration backpack
CamelBak Motherlode gives hydration and organization for long rucks.

How to choose based on goals

  • Weight loss or calorie focus — use steady paces and consistent incline; treadmill makes repeatable tests easier.
  • Functional fitness and balance — outside rucking with variable terrain is superior.
  • Time-crunched or inclement weather — treadmill keeps consistency and safety.

Quick training plan examples

Beginner plan: three sessions weekly at 20–40 minutes with a light vest or plates. Progress by time, then by load. Intermediate plan: include one interval treadmill session for tempo and one outdoor ruck with hills for resilience.

Calculator and tracking

Use the rucking calorie calculator to estimate burn and guide load progression. Click the screenshot below to open the calculator and run numbers for a weighted vest or backpack rucking session.

Rucking calorie calculator screenshot

Rucking app for tracking

For Android users download the Rucking app on Google Play to track calories, use a weight loss calculator for rucking, and access gear links and discounts. Tap the image to open the app listing.

Rucking app on Google Play

Real world tips

  • Practice transitions: add short outdoor walks after treadmill sessions to adapt to terrain.
  • Monitor intensity by heart rate or perceived exertion, not just pace.
  • Hydrate and layer for weather; Pump-Ocalypse is a useful hydration support on hot long efforts.

Sample session and pacing cues

Start with a 10 minute warm up at easy pace and no additional load or minimal weight to practice posture. Add your plates or vest and perform a 30 minute steady-state block at conversational pace where you can speak in short sentences. If on a treadmill, set incline to simulate rolling terrain between 1 and 4 percent. If outside, pick a loop with a few short hills. Finish with five to ten minutes of cool down, ankle mobility drills, and calf stretches. For interval work use three to five repeats of three minutes harder effort with two minutes easy recovery. Keep cadence steady, shoulders back, hips engaged, and avoid leaning forward from the lower back. Record perceived exertion and adjust load so that the last five minutes of a session feel challenging but manageable and recover.

Final recommendation

There is no single winner. Use treadmills for controlled progression and outside rucking for functional fitness and mental benefits. Blend both to build consistency, resilience, and sustainable calorie burn across seasons.

Posted in Uncategorized | Comments Off on Rucking on treadmill vs outside: Which is better?

Calories burned rucking vs eating: compare activity and food choices

Understanding calories burned rucking vs eating

Rucking is walking with added load. Comparing calories burned rucking vs eating requires two simple measures: the energy you expend during the activity and the energy you consume in foods. Both are measured in kilocalories (commonly called calories). The comparison is straightforward when you translate food portions into calories and rucking sessions into calories burned per hour using body weight, pack weight, pace, and terrain.

How to estimate rucking calories

Use a reliable calculator or a rule of thumb. Most people burn roughly 300 to 900 calories per hour rucking depending on intensity. Factors include body mass, added weight, speed and grade. For precise planning, use the Rucking Calorie Calculator to estimate burn.

Practical food comparisons

Translating activity into food helps decisions. For example, a 45 minute moderate ruck might burn 400 calories. That equates roughly to:

  • One fast food hamburger (about 300–600 calories depending on size).
  • A medium latte plus snack (around 300–450 calories).
  • Two medium bananas and a handful of nuts (about 400 calories).

Seeing calories this way helps with real choices in the field: if you burn a 400 calorie session, you can choose to refuel with nutrient-dense whole foods or accept a modest deficit for weight loss.

Calculator and exact tracking

For exact comparisons use the Rucking Calorie Calculator. It gives an evidence-based estimate tailored to your weight and load. Click the screenshot to open the calculator and try a few scenarios before planning meals or training.

Rucking Calorie Calculator screenshot

Gear that changes the math

Adding a vest or heavier rucksack increases caloric cost per hour. If you mainly use a weighted vest for short, intense walks or intervals, a robust vest is a good choice. If you plan longer loaded marches, a ruck backpack offers better comfort and load distribution.

Consider the following gear when choosing how hard to push:

A reliable option for adjustable loads is the Wolf Tactical Adjustable Weighted Vest.


Wolf Tactical Adjustable Weighted Vest for rucking
Wolf Tactical Adjustable Weighted Vest — comfortable, adjustable load for walking and interval rucks.

For longer rucks consider the GORUCK Rucker 4.0 20L.


GORUCK Rucker 4.0 20L ruck pack
GORUCK Rucker 4.0 20L — built for long loads and tough terrain.

Use the app to track real sessions

For Android users the Rucking App on Google Play tracks calories burned while rucking or wearing a weighted vest, offers a weight loss calculator, and links to gear and discounts. Tap the image to open Google Play and install the app to get real-world burn numbers that reflect your pace and terrain.

Rucking App on Google Play

Training tempo, pacing, and calorie efficiency

Tempo matters. Sustained moderate pace with added load produces consistent burn and trains endurance, while interval-loaded short rucks spike metabolic rate and continue burning post-exercise. If time is limited, short high-intensity weighted-vest sessions burn a high number of calories relative to time, but long steady rucks accumulate more total energy expenditure during the session. Aim to mix both weekly: two interval-loaded walks and one long endurance ruck.

  • Interval sessions: 20–40 minutes with 5–10 minute warm up and alternating efforts.
  • Endurance rucks: 60–180 minutes at a steady conversational pace with hydration and small snacks.
  • Recovery: prioritize sleep, protein, and electrolytes for repeat sessions.

Hydration plays a major role in performance and perceived exertion. For long walks use a hydration system like a bladder or bottle to sip consistently. Also consider an electrolyte supplement if you sweat heavily — I use Pump-Ocalypse during long weighted walks to maintain performance and avoid cramping.

Finally, log both intake and output. If you consistently overestimate calories burned and then eat back the entire amount, you stall progress. Using the Rucking App or the online calculator gives numbers to trust. Apply small adjustments rather than dramatic swings to food intake.

Remember consistency with moderate deficits and regular rucking beats sporadic extremes. Use the tools provided and track responsibly, plan meals around training and recover.

Posted in Uncategorized | Comments Off on Calories burned rucking vs eating: compare activity and food choices

Rucking for Bad Back: Safe Weighted Walking and Progressions

Rucking for bad back: an overview

If you have a history of lumbar pain, rucking can still be an excellent way to build strength and burn calories while protecting your back. This guide walks you through assessment, technique, progressive loading, and practical gear choices to help you ruck safely and minimize flare ups.

Assess and clear before you load

Start by seeing a clinician if you have recent or severe sciatica, numbness, weakness, unexplained weight loss, or fever alongside back pain. If cleared, proceed cautiously with these steps.

Body mechanics and breathing

Neutral spine matters. Maintain a slight curve in the lower back, avoid excessive slumping, and hinge at the hips for lifts. Breathe diaphragmatically to stabilize the core during transitions and when picking up weight.

Start with unloaded walking and regressions

If walking with any load increases pain, return to unloaded walking and specific regressions. Focus on cadence, posture, and hip extension. Work on glute bridges, bird dogs, and single leg balance before adding weight.

Gradual loading plan

Progress slowly. Start with a light vest or small ruck plate and very short durations. A reasonable plan is two weeks per step: add 10 percent of load or 10 minutes of time each step and monitor symptoms. Back pain that settles within 24 to 48 hours is usually acceptable; persistent or worsening pain means back off.

Technique cues for rucking

Keep the pack or vest high on your torso so weight sits over the hips. Shorten stride slightly, maintain a steady cadence, and avoid excessive forward leaning. Use trekking poles if balance or shock absorption is needed. If the vest concentrates weight in the front, reduce the load or choose a more balanced carrier.

Comfort-minded vests I recommend include the Wolf Tactical Simple Weighted Vest for adjustable, even loading.


WOLF TACTICAL Simple Weighted Vest for rucking and walking
Comfortable, low-profile vest that spreads load and reduces discomfort.

For longer, hydration-focused rucks consider the CamelBak Motherlode 100oz Mil Spec Crux Hydration Backpack to combine water capacity with adjustable load.


CamelBak Motherlode 100oz Mil Spec Crux Hydration Backpack
Hydration focused pack ideal for long-distance rucks and adjustable weight.

When to stop and seek help

If rucking causes new neurological symptoms, bowel or bladder changes, progressive leg weakness, or severe unrelenting pain, stop immediately and seek medical evaluation. A physical therapist can tailor exercises and progressions that protect healing tissues while improving tolerance for load.

Practical session template

Use this simple session structure once cleared by a clinician.

  • Warm up: ten minutes walking, mobility drills, glute activation.
  • Main: vest or light ruck for ten to twenty minutes at conversational pace; stop if pain increases.
  • Recovery: five to ten minutes easy walking, foam rolling, gentle extension.
  • Progression: increase load or time by small increments every one to two weeks only when symptom free.

Tools and tracking

Track load, time, and pain scores to spot trends. Use the rucking calorie calculator to estimate energy burned for planning nutrition and recovery. Test different vest weights in the calculator to find a conservative starting load.


Rucking Calorie Calculator screenshot
Use this calculator to estimate calories burned for rucking or weighted vest work.

Track sessions with the Rucking app available on Google Play for accurate calorie tracking and weight loss planning.


Rucking app on Google Play
Android app tracks calories burned for rucking and weighted vest sessions, plus gear links and discounts.
Preston Shamblen before and after 90 lb weight loss through weighted-vest training and rucking
Preston Shamblen’s 90 lb transformation achieved through consistent weighted-vest work, rucking, and strength training.

Final tips

Prioritize pain-free progression, balance strength work with conditioning, and focus on even load distribution. If you use plates or heavy vests, favor vest designs that spread weight and keep load high and close to the spine.

If looking for a starter vest, the Wolf Tactical Simple Weighted Vest is comfortable for walks and short rucks, while the CamelBak Motherlode is better for long, hydrated rucks. Links to gear and more tools are in the app and on the site.

Quick checklist

Follow this checklist before adding weight.

  • Medical clearance or absence of red flags.
  • Ability to walk pain free for twenty minutes unloaded.
  • Core and hip activation drills performed daily for two weeks before loading.

If pain flares, reduce load or volume and return to the previous pain-free step. Use a physical therapist to progress safely. Small, consistent increases protect the spine and build work capacity. Rucking is a practical, load-bearing tool to keep you fit when applied with respect for your back and patience.

Posted in Uncategorized | Comments Off on Rucking for Bad Back: Safe Weighted Walking and Progressions

Rucking 30 Days Results: Realistic Expectations

Rucking 30 Days Results

Consistent rucking for 30 days delivers stamina, posture, and steady calorie burn.

What to track

  • Distance/pace
  • Calories
  • Weight

Rucking calculator

Android app: Rucking app Track calories for rucks/vests, weight-loss calculator, and gear links.

Log weekly. Be steady. Keep on

Posted in Uncategorized | Comments Off on Rucking 30 Days Results: Realistic Expectations

Rucking posture with weighted vest: alignment and cues

Why posture matters when rucking with a weighted vest

Good posture matters more when you add load. A weighted vest changes your center of mass, amplifies small alignment errors, and increases repetitive stress. This guide focuses on practical cues, progressions, and gear to keep you moving efficiently and reduce injury risk during ruck walks or runs.

Key posture cues

Start with a neutral pelvis, tall chest, and relaxed shoulders. Think ribcage stacked over pelvis rather than leaning forward from the hips. Keep your chin slightly tucked, eyes forward six to ten meters, and maintain a steady cadence.

  • Neutral spine: avoid overarching or rounding the lower back.
  • Even shoulders: avoid shrugging; let weight settle into torso.
  • Hip hinge on load: initiate power with glutes, not lower back.
  • Short, quick steps: reduce vertical oscillation and impact.

Breathing and bracing

Learn to breathe diaphragmatically while bracing your core. Inhale into the belly, expand the lower ribs, then engage the abdominals gently. A braced midline supports vertebrae under load and improves endurance.

Setup and fit for posture

Proper vest fit is the first line of defense. A vest that rides up, shifts side to side, or pinches the shoulders forces compensations. Adjust straps so the load sits between your sternum and lower ribs and feels secure without restricting breathing.


Wolf Tactical Simple Weighted Vest for rucking and walking
Adjustable fit and even weight distribution to protect posture.

Next paragraph: Consider a ruck with padded straps and sternum or waist stabilization for long efforts. For rucksack users the CamelBak Motherlode offers hydration and centers mass low on the torso, which can help posture on long marches.


CamelBak Motherlode 100oz hydration rucksack
Hydration and balanced load for sustained rucks.

Progression and programming

Start unloaded, master walking mechanics, then add small increments of weight. Use 10% bodyweight increments early and keep sessions brief and frequent. Alternate heavy ruck days with mobility and strength work focused on hips, thoracic spine, and posterior chain.

  • Week one: walk 2–3 times without added load concentrating on posture.
  • Week two: add light vest or small plate and practice 20–30 minute sessions.
  • Week three: increase duration before adding more weight.
  • Mobility: include thoracic rotations, hip hinges, and glute activation.

Troubleshooting common posture problems

If you feel low back fatigue, check hip hinge pattern and reduce load. Shoulder discomfort often means straps are too tight or the vest is pulling the shoulders upward. For forward lean, focus on cadence and hip drive, and shorten step length.

When to seek help

Persistent pain that changes your gait or creates numbness requires a professional assessment. A qualified coach or physical therapist can screen movement and program corrective drills.

Tools and resources

Track burn, pace, and load using the rucking calorie calculator on Rucking.Pro. It helps estimate calories burned for weighted vest and backpack rucking and is a practical tool for planning training and weight loss. Click the screenshot to try it.

Rucking calorie calculator screenshot

For on-the-go tracking use the Rucking app on Google Play. It records calories burned for ruck and weighted vest sessions, provides a weight loss calculator, links to gear and discounts, and keeps a log of your progress.

Rucking app on Google Play

Comfortable gear helps maintain posture under load; consider beginning with the Wolf Tactical Simple Weighted Vest for fit and adjustability and the CamelBak Motherlode for hydration and long distance comfort. Use progressive programming and stay focused on technique.

Sample posture drills and daily checklist

A short daily routine reinforces posture under load and reduces compensatory patterns. Do these drills before a ruck or on recovery days. Each drill should be performed with intent and slow control rather than speed.

  • Glute bridges: 2–3 sets of 8–12 to teach hip extension.
  • Dead bugs: 2–3 sets of 8–10 per side for core stability.
  • Band pull-aparts: 2–3 sets of 12–20 for scapular control.
  • Farmer carry: short carries with moderate load to practice upright posture.

Use a simple checklist: check shoulder relaxation, confirm sternum alignment, test breathing pattern, verify strap snugness, and do a two minute walk to evaluate comfort. If any item fails, adjust fit or reduce load. Tracking sessions and perceived effort helps program safe progress.

Final practical notes

Avoid excessive single long rucks early in your progression. Frequent moderate sessions build posture and tissue tolerance with less risk. Pair rucking with posterior chain strength and mobility at least twice weekly. Hydrate and check footwear for wear patterns that encourage pronation or hip drop. Use the calculators and app to monitor load, calories, and recovery and make adjustments based on objective data. Train smart, ruck strong.

Posted in Uncategorized | Comments Off on Rucking posture with weighted vest: alignment and cues

Why the Apple Watch doesn’t count pack weight and how to fix it

Why your Apple Watch doesn’t count pack weight — and what to do about it

The Apple Watch estimates calories and activity using heart rate, motion, and your personal profile, but it does not add your external pack weight into those calculations. That omission matters when you ruck, hike, or wear a weighted vest: carrying extra load raises energy cost and changes intensity without changing raw heart rate signals the same way. This article explains why the watch behaves this way, how to adjust your training tracking, and practical fixes you can use today.

How wearables estimate effort

Most consumer wearables model calorie burn by combining accelerometer data, heart rate, and user inputs like age, weight, and height. They rarely accept a live ‘load’ input. For reliability companies favor simpler models over adding explicit external weights because sensor noise and diversity of activities make weight inputs complicated to validate. The Apple Watch lacks a setting to add pack weight for outdoor walks or rucks, so the device underestimates the true metabolic cost of load carriage.

Practical steps to improve your tracking

There are reliable ways to account for pack or vest weight outside the Apple Watch ecosystem. Use external calculators and logs, and correct your training records so you don’t under-value hard ruck sessions.

  • Use a rucking-specific calorie calculator to estimate added burn from load.
  • Log pack weight and distance in your workout notes so you have a record of true training stress.
  • Consider an app that supports weight inputs for rucking and weighted-vest sessions.

One practical tool I recommend is the Rucking Calorie Calculator. It models weighted vests and backpack rucking specifically and gives a conservative calorie estimate you can add to your Apple Watch totals. Use the calculator to correct past workouts or plan future sessions.

Rucking Calorie Calculator screenshot

Use the Rucking app for Android to track load and calories

If you use Android, the Rucking app on Google Play supports weight inputs for both rucksacks and weighted vests plus a weight loss calculator and gear links. It allows you to track exactly how many calories you burn while rucking or training with a weighted vest. Tap the image to install:

Rucking app on Google Play

How to reconcile Apple Watch data with ruck-specific estimates

Don’t throw away your Apple Watch data. Instead, treat the watch as a heart-rate and movement recorder and add a correction factor from a rucking calculator. For example, run a baseline unweighted walk to establish heart rate at a given pace, then do a weighted ruck at the same pace and use the calculator to estimate the differential calories from the added load. Add that differential into your training log as “ruck load calories.” Over time you’ll develop a personalized multiplier that adjusts watch estimates when you wear a pack or vest.

Gear note: choose the right vest for consistent tracking

Consistent equipment helps make estimates reliable. If you use a layered, adjustable vest you can keep loads consistent across sessions and reduce variability between watch readings and calculator outputs.


WOLF TACTICAL Simple Weighted Vest
WOLF TACTICAL Simple Weighted Vest — a comfortable, beginner-friendly option that keeps load placement consistent.

Use the inline link for product pages when shopping: WOLF TACTICAL Simple Weighted Vest.

Quick checklist before your next ruck

  • Weigh your pack or vest and record the weight.
  • Run the Rucking Calorie Calculator for the session estimate.
  • Record Apple Watch heart rate and distance for pace context.
  • Add the calculator differential to your training log to reflect true effort.

Two troubleshooting tips speed adoption. First, check strap and watch placement: loose contact and cold fingers produce dropouts that reduce heart-rate-based calorie estimates; snug the watch and warm extremities when possible. Second, use perceived exertion (RPE) as a cross-check — if a weighted ruck feels notably harder than your watch output suggests, trust the RPE and the rucking calculator adjustment. For long rucks, break sessions into ten to thirty minute segments and run the calculator per segment to capture pace and terrain variability. Finally, keep a simple spreadsheet or the notes field in your training app with pack weight, distance, terrain, and calculated ruck calories. That data builds a practical correction model you can apply quickly to Apple Watch sessions without overcomplicating your routine. Start small, measure, and prioritize consistent load progression today.

Apple Watch is excellent for heart rate and GPS tracking, but it wasn’t designed to model external load. Using a dedicated rucking calculator and a load-aware app bridges that gap and keeps your training honest. Track weight, pace, and perceived exertion; use those three inputs and a rucking calculator to make better decisions about recovery and progress. That routine will give you accurate session accounting whether you’re carrying a small pack, a hydration bladder, or a heavy vest.

Posted in Uncategorized | Comments Off on Why the Apple Watch doesn’t count pack weight and how to fix it

Best socks for rucking

Best socks for rucking: protect your feet, go farther

Choosing the best socks for rucking is as important as picking the right boots or weighted vest. Good socks reduce blisters, manage moisture, and provide just enough cushioning and support to keep your feet healthy mile after mile. This guide cuts through brand noise and focuses on function, fabrics, and practical selection criteria for outdoor rucking with load.

Why socks matter more than you think

Socks are the interface between skin and shoe. In rucking, repeated friction, sweat, and load change how your foot moves inside the boot. The right sock does three things: wick moisture, limit friction, and provide targeted padding. Get those three right and you’ll prevent hotspots, reduce blister risk, and maintain comfort on longer marches or weighted walks.

Key features to prioritize

  • Material blend: Merino wool blends or technical synthetics (polypropylene, nylon, polyester) offer moisture control and odor resistance without excessive insulation.
  • Fit and seams: Look for a snug, anatomical fit with flat or no toe seams to avoid pressure points.
  • Cushioning zones: Light to medium cushioning in heel and forefoot helps with impact when carrying weight.
  • Compression and arch support: Mild compression around the arch reduces foot fatigue over long rucks.
  • Height: Crew or over-the-calf for ankle protection in rough terrain; quarter socks can work for short, flat rucks in warm weather.

Materials — pros and cons

Merino wool is excellent because it wicks, resists odor, and regulates temperature. It can be paired with nylon for durability. Pure cotton is a poor choice for rucking because it holds moisture. Synthetics excel for fast-drying and durability; blended options often give the best balance.

What to use for different conditions

  • Hot, high-mileage rucks: Lightweight merino blends or thin synthetic socks that prioritize wicking and ventilation.
  • Cold-weather or multi-day hikes: Midweight merino blends with extra cushion in heel/toe for insulation and comfort under load.
  • Technical or uneven terrain: Socks with reinforced stitching and higher cuffs to protect against brush and debris.

Fit tips and blister prevention

Always ensure a snug fit without bunching. Use a liner sock if you are prone to blisters; a thin synthetic liner reduces friction and is effective with an outer merino sock. Keep nails trimmed, change socks when they are saturated, and consider using friction-reducing balms on common hotspots before a long ruck.

Care and longevity

Wash socks inside out on a gentle cycle and air dry when possible to preserve fibers and elasticity. Rotate multiple pairs to extend lifespan. Replace socks when cushioning compresses or you notice thinning at the heel or toe — degraded socks increase blister risk when carrying load.

Practical recommendations for ruckers

  • Carry two pairs per day on long outings: start dry, swap mid-ruck if necessary.
  • Test socks on short training rucks with the same boots and load you’ll use for longer missions.
  • Match sock height to boot height to prevent chafing at the cuff.

Tools to plan your training and calorie goals

When you plan longer weighted walks, use the online rucking calorie calculator to estimate energy needs and help decide gear and food. Click the image below to open the calculator and see how sock choices affect blisters and pace indirectly by changing comfort and performance.

Rucking calorie calculator screenshot

Track rucking with the mobile app

Use the Rucking app on Google Play to track distance, calories burned, and whether you used a weighted vest or backpack. The app helps log conditions and gear so you can associate sock choices with comfort outcomes. Tap the image to install:

Rucking app on Google Play

Bottom line

Choose the best socks for rucking based on material, fit, and cushioning for your climate and load. Test pairs on training rucks, rotate them, and track your results with the calculator and app. Small investments in quality socks deliver outsized returns in comfort, performance, and fewer blister days on the trail.

Posted in Uncategorized | Comments Off on Best socks for rucking